sábado, 30 de agosto de 2008

Look at me


1.- Abro un paño de 500 x 400 y relleno con gradiente

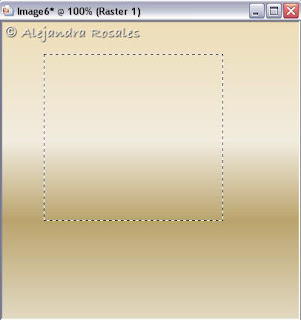
Open a mew layer 500x400 and fill with gradient.


2.- Capa/nueva capa, vuelvo a rellenar con el gradiente, pero invertido.
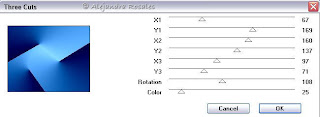
Efectos VM Instant Art/Three cuts:


Layer/new layer, fill with gradient again but invert checked.
Effects VM Instant Art/Three cuts:


bajo opacidad aproximadamente al 50%.
3.- Capa nueva capa. vuelvo a invertir el gradiente y relleno. Aplico Filtro L en K´s/Trouble:

lower opacity 50%.
3.- Layer/new layer. Invert gradient again and fill.
Apply Filtter L en K´s/Trouble:


los valores dependerán del color del gradiente que estamos utilizando. Bajo la opacidad de esta capa 57%. Efectos/Efectos de contraste/Realzar.

The values will depend on gradient used. Lower oppacity of this layer 57%. Effects/edge effects/enhace.

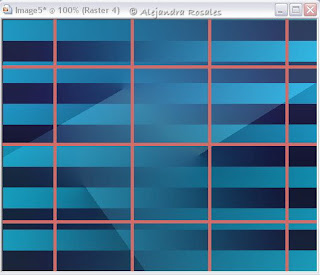
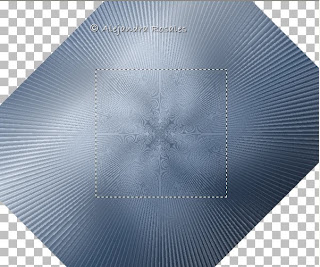
4.- Capa/nueva capa. Filter Factory C/The Grid:

Layer/Mew layer. Filter Factory C/The Grid:


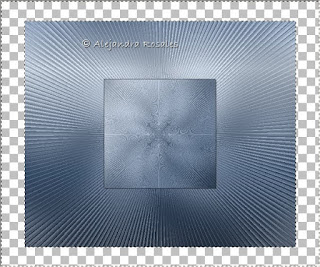
5.- Capa/Nueva capa, posicionándome en la capa de la grilla, selecciono con la varita mágica dentro de los cuadrados alternados:

Layer/New layer, positioned in grid layer, select with magic wand inside the alterned squares.

y relleno con el gradiente cambiando a 3 repeticiones. Filtro Penta.com/Jeans:
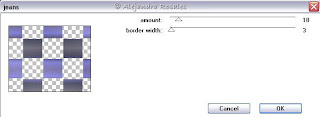
fill with gradient, repet 3. Filtter Penta.com/Jeans:


Quito la selección. Bajo la opacidad de esta capa 59%.
Deselect. Lower the oppacity of this layer 59%.

6.- Capa/Nueva capa. Posicionado en la capa de la grilla, selecciono los otros cuadrados, cambio la repetición del gradiente y relleno, aplico filtro jeans nuevamente alternando los valores (92/5). Bajo opacidad 42%.

6.- Layer/new layer. On layer grid, select other squares, change the gradient repeats and fill, apply Jeans filtter again, changing values (92/5). Lower the oppacity 42%.

7.- Borro la capa de la grilla.
Delete grid layer.

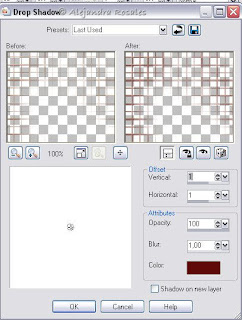
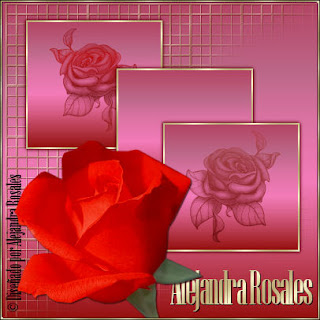
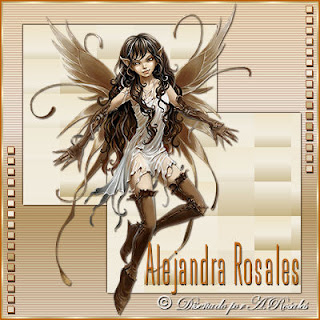
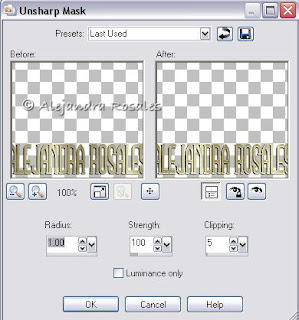
8.- Pego mi tube y aplico sombra.
Paste your tube and apply shadow.

9.- Nombre
Name

Selección/Seleccionar todo/Flotar. Inner Bevel. Sombra.
Selections/Select all/Float. Inner bevel. Shadow.

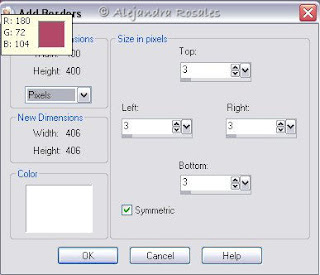
9.- Imágen/Agregar bordes:
Image/Add borders:


10.- Con la varita mágina selecciono el borde blanco y relleno con patrón dorado.
With magic wand select the white border and fill with gold pattern.

11.- guardo como jpg
Save as jpg.

jueves, 28 de agosto de 2008

Tag Flower


1.- Abro un paño de 400 x 400 y relleno con gradiente
Open a new layer 400x400 and fill with gradient


2.- Capa/nueva capa, aplico brush Yoka LesWinterr (adjunto) en dorado y sombra:
Layers/new layer, apply brush Yoka LesWinterr (attached) in gold
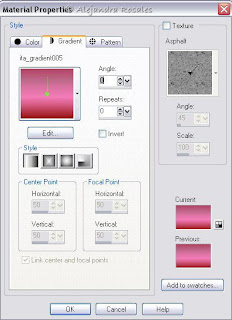
3.- Capa/nueva capa y con la herramienta de selección, un cuadrado que relleno con patrón dorado, Selecciones/Modificar/Contraer 2, capa/nueva capa y relleno con el gradiente, quito la selección. Capas/Fusionar/Merge down. Aplico sombra con valores positivos y negativos:

Layer/new layer, select a square with selection tool and fill woth gold pattern. Selections/select all/Modify/contract 2, layer/mew layer and fill with gradient, unselect. Layers/Merge/Merge down.
Apply shadow positive and negative values:


y duplico este cuadrado dos veces.
duplicate the square twice.

En dos de los cuadrados aplico un brush en color oscuro.
In both squares apply a brush in dark color.

4.- Copio y pego mi tube y agrego sombra.
Copy and paste your tube and apply drop shadow.

5.- Agrego texto y sombra.
Add text and shadow.

6.- Imágen/Agregar bordes:
Image/add borders:


7.- Con la varita mágina selecciono el borde blanco y relleno con patrón dorado. Sin quitar la selección, efectos 3D/Cutout:

With magic wand select the white border and fill with golden patters, Without deselect, effects 3D/cutout:

y nuevamente con valores negativos.
again with negative values.

8.- guardo como jpg
save as jpg.


martes, 19 de agosto de 2008

Fairy


Materiales necesarios/Materials needed:
1 tube
1 selección adjunta/1 attached selection DOWNLOAD
Filtro VM Distortion


1.- Abro un paño de 400 x 400, relleno con un gradiente
Open new document 400x400, foodfill with gradient

2.- Con la herramienta selección, selecciono un cuadrado:
With selection tool, select an square:
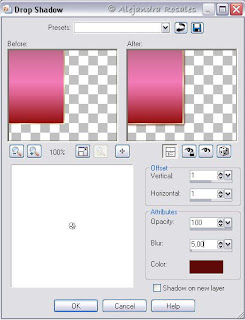
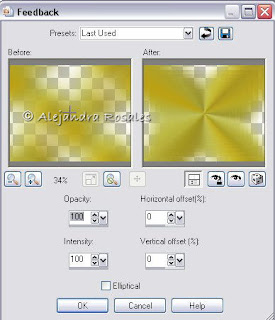
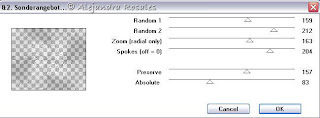
3.- Aplico el filtro VM Distortion/Tilomat 2000 con estos valores:
Apply VM Distortion/Tilomat 2000 pluggin with this values:

4.- Sin quitar la selección: Edición/Copiar (Ctrl+C), Edición/Pegar como nueva imágen.
Don´t deselect: Edition/Copy (Ctrl+C), Edition/Paste as new image.

5.- En el paño original de 400 x 400 clickeo la tecla deshacer 
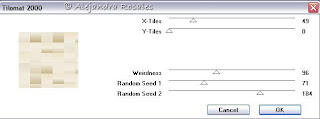
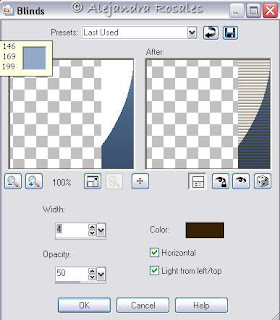
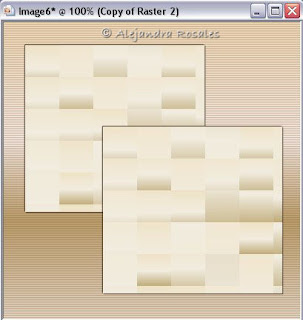
dos veces para volver a la imágen original con el gradiente. Efectos/Textura/Blinds:
In the original 400x400 layer click re do twice, to reach the original image. Efects/Texture/Blinds:

6.- Voy a la imágen con el filtro VM que copié y la pego como nueva capa en este paño, le aplico sombra con valores positivos y negativos. Duplico esta última capa y acomodo.
Go to the VM filter image copied and paste as new layer in this document, apply drop shadow positive and negative values. Duplicate this last layer and move it to his place.

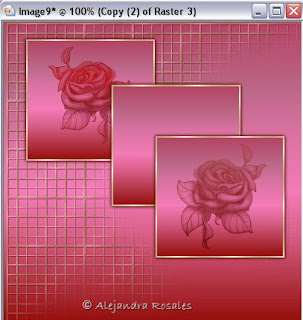
7.- Copio, pego mi tube y aplico sombra.
Copy and paste the tube, apply drop shadow.

8.- Abro un nuevo paño transparente de 600x600. Selecciones/Cargar del disco: Selección 1 (adjunta)
Open a new transparent document 600x600. Selections/from disk:
Selection 1 (attached)
Pinto la selección con color oscuro de mi imágen
Fill the selection with a dark color of our image.

9.- Selecciones/Modificar/Contraer 1 y relleno con gradiente dorado, quito la selección y copio y pego como nueva capa en mi trabajo. Agrego sombra.
Agrego nombre y sombra
Selections/modify&contract 1 and foodfill with gold gradient, deselect, copy and paste as new layer in my work. Add drop shadow.
Add name and shadow.

10.- Fusiono capas visibles. Capa/Nueva capa. Seleccion/Selleccionar todo, relleno con color oscuro de mi imagen. Selección/Modificar/Contraer 2 y relleno con gradiente dorado.
Selección/Modificar/Contraer 2 y aprieto la tecla Delete.
Merge layers. Layer/New layer. Selection/Select all, fill with dark color. Selection all/modify/Contract 2 and foodfill with gold gradient.

sábado, 16 de agosto de 2008

Tag feedback


Materiales necesarios/Materials needed:

Solo 2 tubes

For this tutorial you only will need: 2 tubes

1.- Abrir una imágen de 500 x 400 fondo transparente.
Open a new 500 x 400 transparent image.

2.- pegar un tube de flores.
Paste your flower tube.

3.- Efectos/Imagen efectos/Seamless Tiling.
Effects/Image effects/Seamless Tiling.


4.- Adjustar/Blur/Gaussian Blur: 35
Adjust/Blur/Gaussian Blur: 35

5.- Efectos/efectos reflección/ Feedback
Effects/Reflection effects/ Feedback


6. Capa/Nueva capa, rellenar con #ffffc0, Capas/Ordenar/Enviar abajo.
Layers/New Raster layers, flood fill with #ffffc0, Layers/arrage send to bottom.

7. vuelvo a la capa anterior, la del efecto feedback y la duplico. Imagen/Redimensionar 75%.
Aplico Sombra:

Return to the previous layer, those with the feedback effect and duplicate. Image/Resize 75%.
Shadow:


vuelvo a aplicar sombra pero con los valores negativos.
shadow again with negative values.

8.- Vuelvo a duplicar la capa nuevamente y redimensionar 75%.
Duplicate layer again and resize 75%.

9.- Agrego sellos para decorar.
You could decorate with any tube.

10.- Capa/Nueva capa/Agrego texto. Sombra (1. -1, 95, 1).
Layers/New Raster layer/Add your text. Shadow (1. -1, 95, 1).

Ajustar/Sharpness/Unsharp Mask:
Adjust/Sharpness/Unsharp Mask:


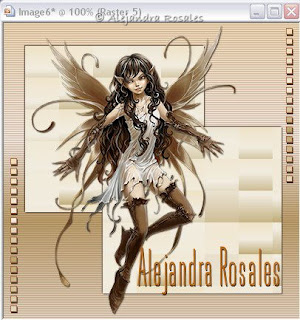
11.- Agregar bordes 3 simétrico, blanco.
Add borders, symmetric 3 in white color.

12.- Capas/Nueva capa/ relleno con patrón dorado. Seleccionar todo (Ctrl+A), selección/modificar/Contraer 3, presiono la tecla Supr (Borrar). Sombra con valores positivos y negativos.

Layers/New Raster layer/ flood fill with a gold pattern. Selection All (Ctrl+A), selections/modify/Contract 3, hit the Delete . Shadow with possitive and negative values.

13.- Sin quitar la selección, selecciones/Modificar/Contraer 1 y relleno con #ffffc0, borrar.
Without deselect. selections/modify/Contract 1 and flood fill with #ffffc0, delete.


Otro ejemplo:
Another example:


viernes, 15 de agosto de 2008

TAG NEW


Material necesario/Material needed:

- un sello/one tube
- Filtro Neu!/Sonderangebot (Plugin New/Sonderangebot)
- Filtro Efectos FFG???/Auto Elipse (Plugin FFD Effect/Auto Elipse)
- Filtro Efecto I-Decay/Radial Diffuse (Plugin Efecto I-Decay/Radial Diffuse)


1. - Abro un paño de 600 x 400, relleno con gradiente.
Open a transparent 600 x 400 new image.

2.- Capas/Nueva capa. Filtro Neu!/Sonderangebot con los siguientes valores:
Layers/New raster layer/Plugin Neu! /Sonderangebot with following settings:


3.- Capas Fusionar/Fusionar capas visibles. Imagen rotar libre: 45 y con la herramienta de selección, selecciono el cuadro central
Layers Merge/Merge visible. Imagen free rotate: 45 and with selection tool, select el center square


Edit/Copy como nueva imagen. En el paño anterior apretamos deshacer dos veces para volver a la posición original.
Edit/Copy as new image. In the other image we´d work previously, hit undo twice, to return to original position.

4.- Pegamos la imagen del centro que copiamos como nueva capa y aplicamos sombra:
Vertical y Horizontal: 1, Opacity: 71, Blur: 2
Paste the center image as new layer and apply shadow: V/H: 1. Opacity: 71, Blur: 2

5.- Imagen redimensionar: 85% (todas las capas destildado). Seleccionamos el borde con la varita mágica
Image resize 85% (all layers unchecked). Select the border with the magic hand


y rellenamos con el gradiente original.
Flood fill with the original gradient.

6.- Efectos/Plugin FFG???/Auto Elipse
Plugin FFG???effects/Auto Elipse


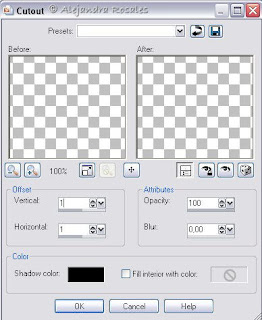
7.- Sin quitar la selección Efectos/Textura/persiana:
keep selected. effects/Texture/Blinds:


Sombra con valores positivos y negativos.
Shadow with possitive and negative values.

8.- Pego mi tube como nueva capa y duplico.
Paste the tube as new layer and suplicate.

Efecto I-Decay/Radial Diffuse
Plugin I-Decay/Radial Diffuse


9.- Redimensiono el tube original 90% y acomodo. Aplico sombra.
Resize the original tube 90% place with the move tool. Apply shadow.

Pongo nombre y sombra.
Apply your text and shadow.

10.- Agrego borde simétrico 1 blanco.
Add border, symmetric 1, white color.

11.- Agrego borde simétrico de 6, seleccionar con la varita mágica y rellenar con el gradiente, aplicar biselado.
Add border: 6, select with the magic hand, fllod fill with the gradient, apply inner bevel.

Guardo como .jpg
Save as .jpg